I have the very first computer my parents ever bought (
a Tomy Tutor, a strange relative of the Texas Instruments 99/4A). I have the first Mac I ever owned, a Macintosh IIsi which was a gift from a family at church; they got it as part of some pallet of stuff they bought and had no use for it. And I still have the first Mac I ever bought new. In fact, now that I think about it, I think this was the first
computer I ever bought new.
Here's its sales receipt: a Power Mac G4 DP 1.25GHz (what is colloquially called a "Mirrored Drive Doors" or MDD variant). This was, at least officially and at that time, the last generation of Power Mac that could boot Mac OS 9 natively and the most powerful specification Apple offered that did so. In fact, I bought it specifically for that reason even though I was a starving student and really couldn't afford it because I still had, and have, a big investment in classic Mac applications. I don't remember if I got the education discount, but as specified with dual 1.25GHz 7450 CPUs, 512MB of RAM, 120GB hard disk, 64MB ATI Radeon 9000 Pro and an extra 512MB stick it cost me $3339 before tax in December 2002 (they comped me the install fee). The Quad G5 I bought a little over three years later cost roughly the same out of pocket, so in today's dollars the MDD was actually more expensive. I bought it on an Apple Loan, natch; the Quad I paid for in cash.
The MDD is still connected to my KVM along with my SGI Fuel, Quad G5 and the Raptor Talos II I'm typing on which is my current daily driver. The MDD was my daily driver for about three years, dual-booting Jaguar and Mac OS 9.2.2. Even after the Quad G5 replaced it as my primary machine, I upgraded it to 2GB of RAM (though Mac OS 9.2.2, now its sole operating system, only supports 1.5GB), a 256MB Radeon 9000 Pro and a Sonnet Encore/MDX processor card with dual 1.8GHz 7447A G4 CPUs. It also got a second SuperDrive and a second hard disk, a G4Port serial adaptor to replace the modem which I rarely used and a Formac ProTV tuner/digitizer, and it still has two slots and two more drive bays free. It's not survived perfectly -- the audio jacks got mangled in an accident, so I have to use a USB adaptor for audio in and a set of Pro Speakers -- but the important stuff still works dandy. Classilla is built on this machine, along with my work on Power MachTen and of course all those great late 1990s Mac game ports (though No One Lives Forever, which I bought with it, requires 10.1.4 so I play it on the G5 in Tiger).
On Sunday I was making progress on getting the classic Mac OS to speak TLS 1.3 with a little help (more about this soon). I pressed the power button to transfer my work over and test it and ... nothin'.
MDDs are great machines, but they're notorious for two particular failings: they can howl like anything (nicknamed the "Windtunnel G4") when they heat up, and their power supplies suck. The power supply was undoubtedly what failed, so that means ... a Refurb Weekend!
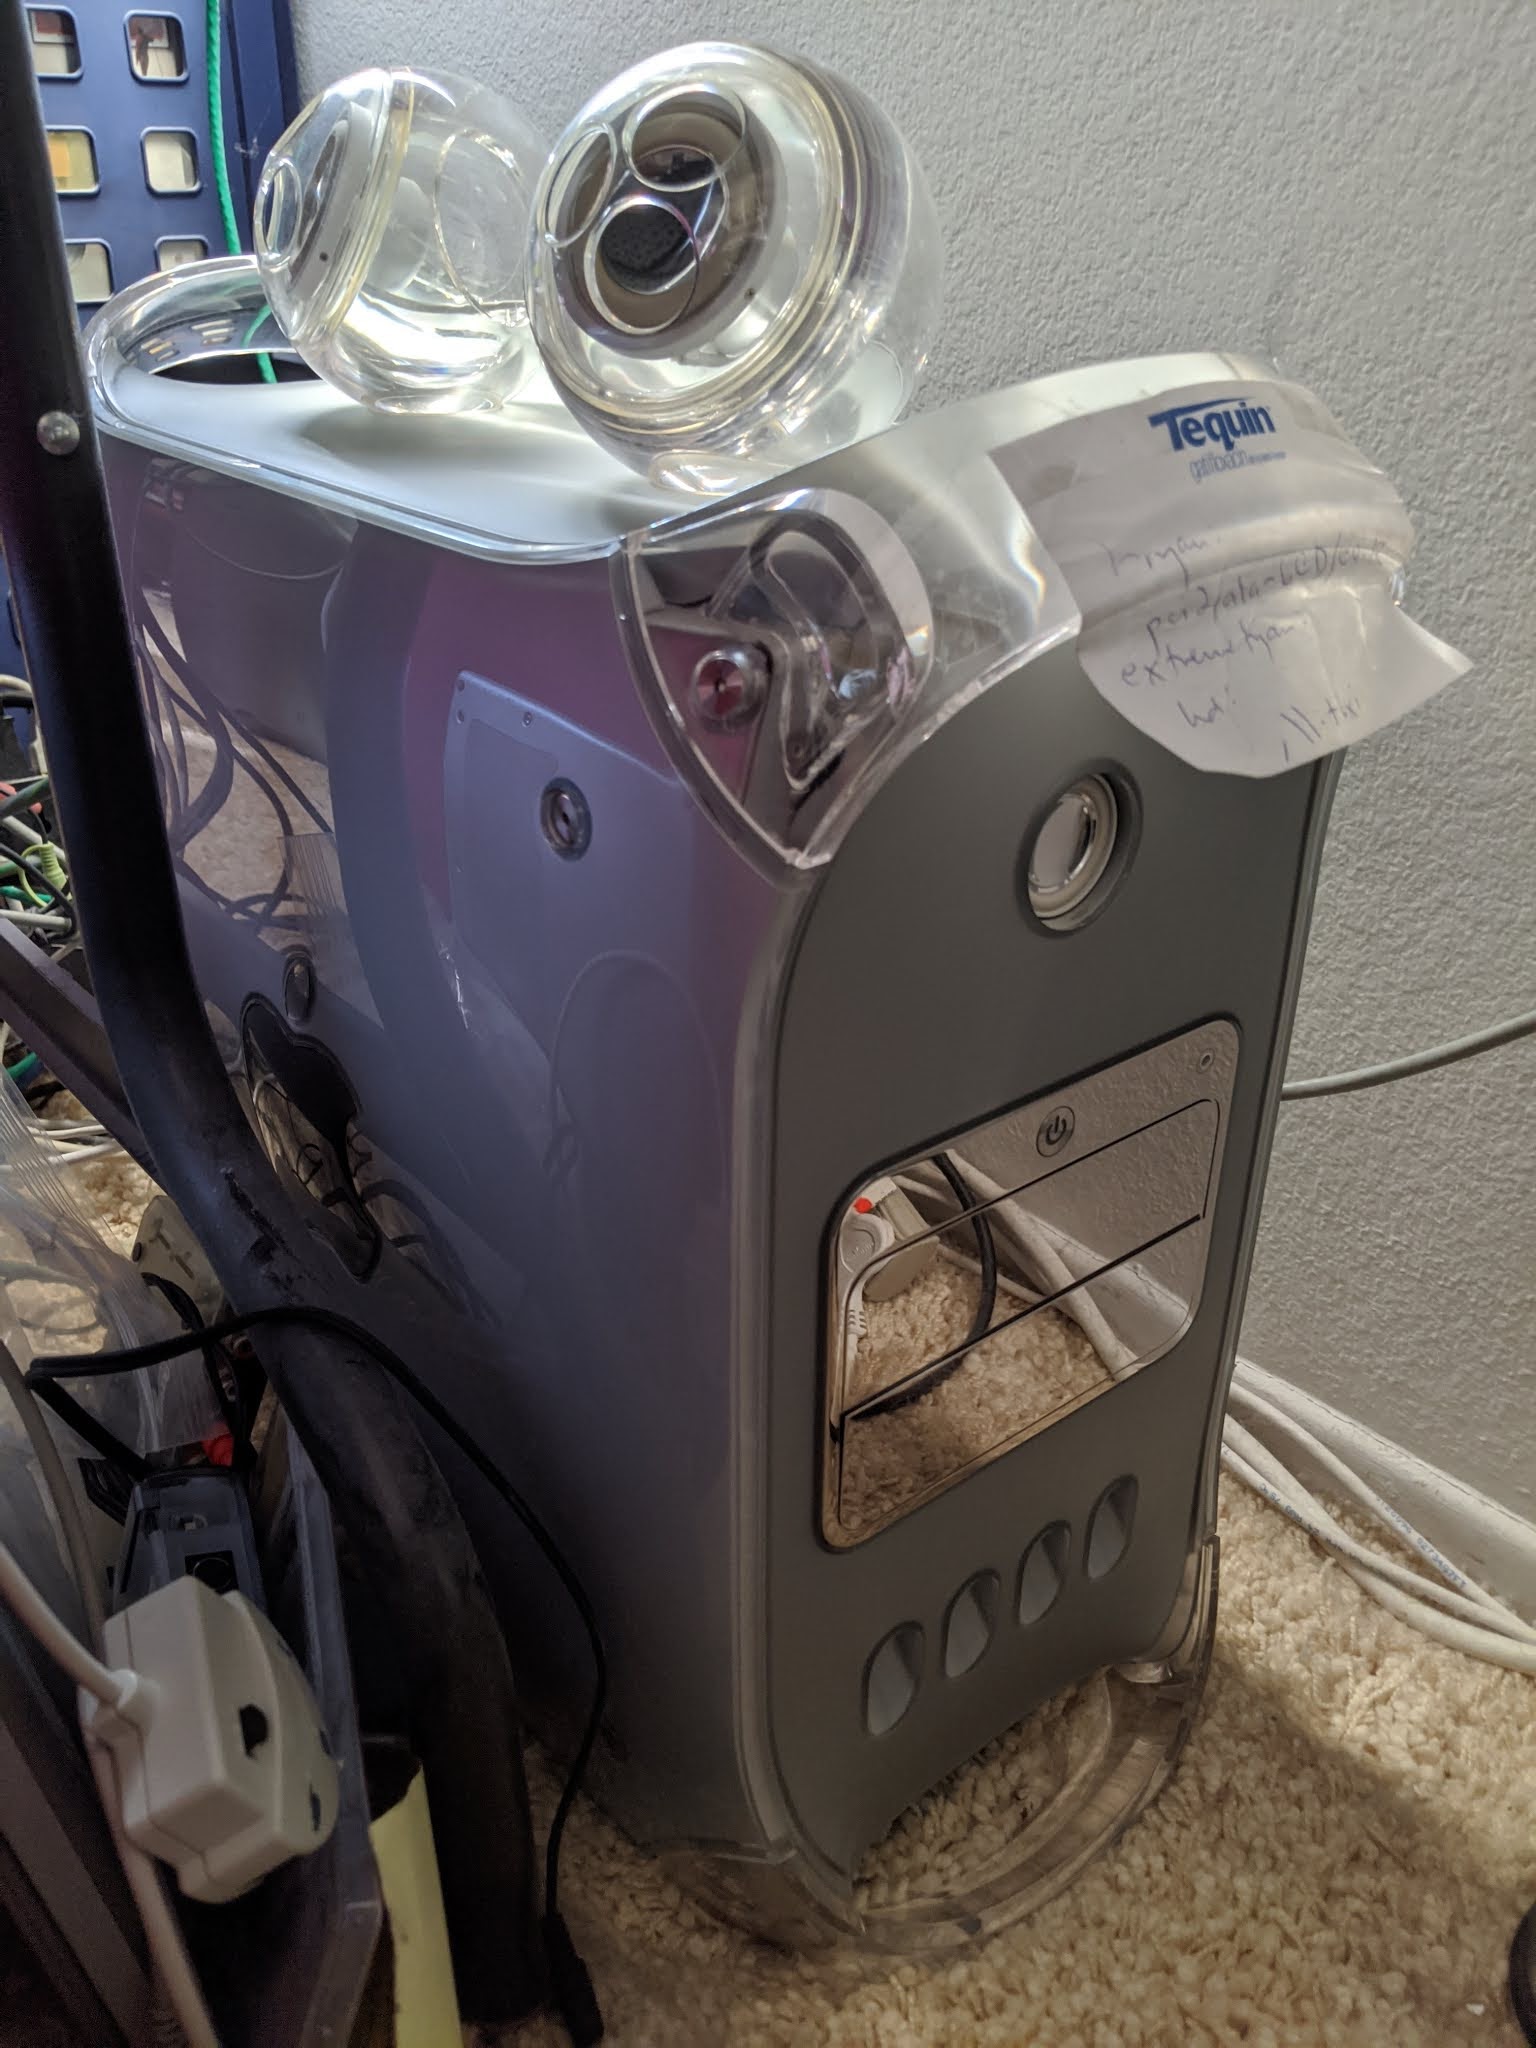
Ugh, dusty. The Post-It note on the front was to remind me of the Open Firmware path for the internal hard disks. Let's clean it up a little first. (By the way, I hate the speaker grille for these things, so I never installed it.)
The MDD was the last of Apple's "outrigger" Macs. This started with the Power Mac 7200, 7300, 7500 and 7600, and then evolved into the desktop Beige G3 and then reached its zenith with the Blue and White "Yosemite" Power Macintosh G3. These, along with the Power Mac G4, simply open by lifting a latch on the side and the entire motherboard swings down. No screws. Upgrades are a snap.
At this point we paused for a few minutes to blow out all the dust.
Naturally, the power supply (up top) is non-standard, just to be difficult. It is a modified ATX supply (in a weird case that reminds me of the Mini-ITX form-factor, at least in width) with different pinout that in addition to the usual voltages also provides 25V for the Apple Display Connector on the ATI GPU. They came in a 360W Samsung and a 400W AcBel. Fortunately I keep spares, so we will be replacing this 400W AcBel with the NOS 360W Samsung I had in my stock closet. (
It is possible to rewire an ATX supply to provide the voltages sans the ADC's 25V line, but an ATX supply won't fit on the shelf inside the case to hold the PSU. We'll consider potential mounting options for the next time this thing chews through one.)
Giving the new PSU a quick test after unplugging the duff PSU's main power connector. You can see the power LED on the board and the fan for the Sonnet upgrade both activate and the Mac "bongs." Time to install it.
The main power connector and the power connector for the accessory drive bay run through the back of the case. This means the optical drives need to be pulled out to access them. Two screws, one at the top front facing the case front and one at the bottom rear facing you, hold the optical drive cage in place. Remove those, take the Faraday panel off the back, unplug the ATA and power cables and set the cage aside.

The main case fan doesn't need to be unplugged, though it might make this easier. Either way, lift it straight up from its little guides and put it aside. The main power cable is now exposed. To remove the power connectors to the hard disks in the rear drive bay, remove the screw from the drive cage's little eyelet (if the screw is there), then find the release lever on its left, pull it towards you and slide the drive cage up just a bit to free it from its socket. Remove the power connectors and, if you like, the ATA connectors as well and set it aside. If you choose to remove the ATA connectors, this is assisted by sliding off the flat black cable clip on the bottom of the case that keeps the ATA cable from bunching up.
A little aperture just in back of where the main fan sits is where the main power and the power lines for the accessory hard disk bay (unpopulated here) are threaded. Pull them out one at a time.
Two screws attach the power supply. The first is a 2.5mm hex screw. This usually needs some cranking to remove and replace.
The second is a Phillips-head screw that bolts a little metal eyelet on the end of the PSU to the case wall. Remove both, slide the PSU from the rear of the case towards the front and take it out.
Install the new PSU and bolt in both the front hex screw and rear Phillips screw. (The hex screw will spin uselessly if it doesn't mate. You need both in because without doing so the PSU will tend to wiggle or shift trying to connect the power cord.) Thread one of the power connectors and the main power connector back in through the rear aperture. Reconnect the main power.
Whenever I have one of my Power Macs open, I
always check the 3.6V 1/2AA PRAM battery. This one was, not unexpectedly, dead as a doornail (that's 18.6
millivolts). Fortunately, I keep some of them in stock also.
Replace the main case fan, reconnect the hard disk and optical drive cages, and close it back up.
Back in action. I needn't point out that Mac OS 9 absolutely screams on a machine of this specification.
And just as pretty as ever. I actually do have an Apple Studio Display in storage with an ADC connector I've thought about pairing this with, but fortunately I also have the ADC converter box (basically a power supply that breaks out DVI and USB), so even if I did convert this to some sort of mutant SFF ATX (or SFX) power supply I could still use the Studio Display. In the meantime, I'll see about possibly getting this supply professionally refurbished. I have at least one other in stock along with a full body double but I'd like to keep this trusty machine going as long as I can.


I love these Refurb Weekend posts - I don't even own an MDD and I enjoyed reading this. Thanks for sharing the process - oh, and interested to hear more about TLS 1.3 on Classic Mac. :)
ReplyDeleteHey, thanks! I think I have something basic working but it needs some fleshing out. More to come.
DeleteI recently picked up one of these in relatively good condition from a FBook marketplace. It does not turn on. I suspect a similar issue with the PSU. I am still looking into it...
ReplyDelete