Monday, October 12, 2020

Refurb weekend: Power Mac G4 MDD

I have the very first computer my parents ever bought (a Tomy Tutor, a strange relative of the Texas Instruments 99/4A). I have the first Mac I ever owned, a Macintosh IIsi which was a gift from a family at church; they got it as part of some pallet of stuff they bought and had no use for it. And I still have the first Mac I ever bought new. In fact, now that I think about it, I think this was the first computer I ever bought new.
Here's its sales receipt: a Power Mac G4 DP 1.25GHz (what is colloquially called a "Mirrored Drive Doors" or MDD variant). This was, at least officially and at that time, the last generation of Power Mac that could boot Mac OS 9 natively and the most powerful specification Apple offered that did so. In fact, I bought it specifically for that reason even though I was a starving student and really couldn't afford it because I still had, and have, a big investment in classic Mac applications. I don't remember if I got the education discount, but as specified with dual 1.25GHz 7450 CPUs, 512MB of RAM, 120GB hard disk, 64MB ATI Radeon 9000 Pro and an extra 512MB stick it cost me $3339 before tax in December 2002 (they comped me the install fee). The Quad G5 I bought a little over three years later cost roughly the same out of pocket, so in today's dollars the MDD was actually more expensive. I bought it on an Apple Loan, natch; the Quad I paid for in cash.

The MDD is still connected to my KVM along with my SGI Fuel, Quad G5 and the Raptor Talos II I'm typing on which is my current daily driver. The MDD was my daily driver for about three years, dual-booting Jaguar and Mac OS 9.2.2. Even after the Quad G5 replaced it as my primary machine, I upgraded it to 2GB of RAM (though Mac OS 9.2.2, now its sole operating system, only supports 1.5GB), a 256MB Radeon 9000 Pro and a Sonnet Encore/MDX processor card with dual 1.8GHz 7447A G4 CPUs. It also got a second SuperDrive and a second hard disk, a G4Port serial adaptor to replace the modem which I rarely used and a Formac ProTV tuner/digitizer, and it still has two slots and two more drive bays free. It's not survived perfectly -- the audio jacks got mangled in an accident, so I have to use a USB adaptor for audio in and a set of Pro Speakers -- but the important stuff still works dandy. Classilla is built on this machine, along with my work on Power MachTen and of course all those great late 1990s Mac game ports (though No One Lives Forever, which I bought with it, requires 10.1.4 so I play it on the G5 in Tiger).

On Sunday I was making progress on getting the classic Mac OS to speak TLS 1.3 with a little help (more about this soon). I pressed the power button to transfer my work over and test it and ... nothin'.

MDDs are great machines, but they're notorious for two particular failings: they can howl like anything (nicknamed the "Windtunnel G4") when they heat up, and their power supplies suck. The power supply was undoubtedly what failed, so that means ... a Refurb Weekend!

Ugh, dusty. The Post-It note on the front was to remind me of the Open Firmware path for the internal hard disks. Let's clean it up a little first. (By the way, I hate the speaker grille for these things, so I never installed it.)
The MDD was the last of Apple's "outrigger" Macs. This started with the Power Mac 7200, 7300, 7500 and 7600, and then evolved into the desktop Beige G3 and then reached its zenith with the Blue and White "Yosemite" Power Macintosh G3. These, along with the Power Mac G4, simply open by lifting a latch on the side and the entire motherboard swings down. No screws. Upgrades are a snap.

At this point we paused for a few minutes to blow out all the dust.

Naturally, the power supply (up top) is non-standard, just to be difficult. It is a modified ATX supply (in a weird case that reminds me of the Mini-ITX form-factor, at least in width) with different pinout that in addition to the usual voltages also provides 25V for the Apple Display Connector on the ATI GPU. They came in a 360W Samsung and a 400W AcBel. Fortunately I keep spares, so we will be replacing this 400W AcBel with the NOS 360W Samsung I had in my stock closet. (It is possible to rewire an ATX supply to provide the voltages sans the ADC's 25V line, but an ATX supply won't fit on the shelf inside the case to hold the PSU. We'll consider potential mounting options for the next time this thing chews through one.)
Giving the new PSU a quick test after unplugging the duff PSU's main power connector. You can see the power LED on the board and the fan for the Sonnet upgrade both activate and the Mac "bongs." Time to install it.
The main power connector and the power connector for the accessory drive bay run through the back of the case. This means the optical drives need to be pulled out to access them. Two screws, one at the top front facing the case front and one at the bottom rear facing you, hold the optical drive cage in place. Remove those, take the Faraday panel off the back, unplug the ATA and power cables and set the cage aside.
The main case fan doesn't need to be unplugged, though it might make this easier. Either way, lift it straight up from its little guides and put it aside. The main power cable is now exposed. To remove the power connectors to the hard disks in the rear drive bay, remove the screw from the drive cage's little eyelet (if the screw is there), then find the release lever on its left, pull it towards you and slide the drive cage up just a bit to free it from its socket. Remove the power connectors and, if you like, the ATA connectors as well and set it aside. If you choose to remove the ATA connectors, this is assisted by sliding off the flat black cable clip on the bottom of the case that keeps the ATA cable from bunching up.
A little aperture just in back of where the main fan sits is where the main power and the power lines for the accessory hard disk bay (unpopulated here) are threaded. Pull them out one at a time.
Two screws attach the power supply. The first is a 2.5mm hex screw. This usually needs some cranking to remove and replace.
The second is a Phillips-head screw that bolts a little metal eyelet on the end of the PSU to the case wall. Remove both, slide the PSU from the rear of the case towards the front and take it out.
Install the new PSU and bolt in both the front hex screw and rear Phillips screw. (The hex screw will spin uselessly if it doesn't mate. You need both in because without doing so the PSU will tend to wiggle or shift trying to connect the power cord.) Thread one of the power connectors and the main power connector back in through the rear aperture. Reconnect the main power.
Whenever I have one of my Power Macs open, I always check the 3.6V 1/2AA PRAM battery. This one was, not unexpectedly, dead as a doornail (that's 18.6 millivolts). Fortunately, I keep some of them in stock also.
Replace the main case fan, reconnect the hard disk and optical drive cages, and close it back up.
Back in action. I needn't point out that Mac OS 9 absolutely screams on a machine of this specification.
And just as pretty as ever. I actually do have an Apple Studio Display in storage with an ADC connector I've thought about pairing this with, but fortunately I also have the ADC converter box (basically a power supply that breaks out DVI and USB), so even if I did convert this to some sort of mutant SFF ATX (or SFX) power supply I could still use the Studio Display. In the meantime, I'll see about possibly getting this supply professionally refurbished. I have at least one other in stock along with a full body double but I'd like to keep this trusty machine going as long as I can.

Sunday, October 4, 2020

Stereoscopic computing: converting Quake and Doom

This article is part of a series -- you can read other entries

In our first 3D article, we talked about the basics of stereoscopic computing, including anaglyph rendering and active versus passive displays, and demonstrated a tool for turning a twinned set of webcams into a 3D image.

Games, of course, are the most obvious application, but early 3D games mostly dealt with the phenomenon as overlapping 2D planes due to the lack of 3D acceleration, limited CPU power and the predominance of 2D sprite hardware in contemporary video chips. These almost all used anaglyph colours (red/cyan glasses and others), but a few exploited the Pulfrich effect, and we'll look at some examples of these with the Commodore 64 in a later post. Even true stereoscopic systems like the Virtual Boy still largely used scaled planar images rather than true 3D graphics even though their separated video pathways yielded much better results (and eyestrain). As our previous article discussed, we try to avoid anaglyph rendering because all of them have some level of colour distortion (because they use colour differences to deliver a different picture to each eye) and ghosting (because that process is imperfect), and Pulfrich rendering, for reasons we will discuss, has only limited applications. For these examples, we will continue with my trusty Mitsubishi Diamondcrysta RDT233WX-3D, a passive polarized 3D display, though this should work for any passive 3D monitor or television. The general principles also apply to active systems like Nvidia 3DVision, though the details will be peculiar to each particular vendor-proprietary system.

One of the earliest games to have a true 3D mode built into it was id Software's Quake, and, perfect for alternating line polarized passive displays, it interlaced the left and right eye views. However, it was actually created for active glasses alternating between left and right views in sync with the alternating scans of a CRT monitor (here is one such scheme), though this method can still be simulated with a line blanker with modern display cards and LCD panels. This code persisted into early source ports of Quake when id released the code under the GPL, such as in the software-rendered SDLQuake, and is enabled by going to the console and entering lcd_x 1 (the higher the value, the greater the stereo separation). SDLQuake can still, with some effort, be built on modern systems but is strictly limited to 640x480. Naturally, interlaced images will not appear in 3D on a 2D monitor, and may need to be downloaded and moved to the right vertical position to match the polarization order of your screen. For reasons that will become clear in a moment, these were captured during demo playback and could not be paused, but they still serve for purposes of comparison even though the scenes are not exactly identical.

lcd_x 0 (default, 2D only)

lcd_x 1

lcd_x 5

The highest stereo separation yields great effects for most of the display but makes the weapon uncomfortably close, which even without 3D glasses you can tell by how widely spaced the left and right views of it are. For my money the game is really only playable at the lowest separation setting, except that on modern 64-bit systems, SDLQuake and other early releases are not playable at all; they crash immediately when trying to start a new game because they are not 64-bit aware.

Modern Quake ports have corrected this problem but in turn have eliminated much, if not all, of the original stereoscopy support. A few have secondarily added back 3D using alternative means. One such port is Quakespasm, a continuation of the older Fitzquake, which in turn descends from id's GLQuake. Unfortunately, it only has an anaglyph mode (set r_stereo to a non-zero value in the console) and the old interlaced mode is gone. Let's fix that!

Pure software rendering would deal with this problem by taking two images and going to bottom copying one view to odd lines and the other to even lines. A faster approach on systems with SIMD is to blit over one screen entirely using those nice fat vector registers and then line in the other appropriately, which is the approach we took in Camaglyph. However, this is using OpenGL, so we have an additional option of using the stencil buffer. A stencil buffer approach would draw alternating lines in the stencil buffer and then map the left view and right view depending on whether there's a line in the stencil buffer or not. GLQuake does not itself make use of the stencil buffer (too early) and Quakespasm only uses it to prevent intersecting shadows, so we can easily remove that small amount of code to have exclusive control of the stencil buffer since the shadow intersection code is infrequently of rendering relevance.

I don't claim this to be the best way of accomplishing it, but here's my patch against current versions. You will, of course, have to build it yourself from the source code. To enable it, go into the console (usually the tilde key) to set the appropriate options. r_stereo, same here as in regular Quakespasm, sets the stereo separation. I wouldn't make this much higher than 2.0; even that gave me a little bit of a headache, but since it's helpfully a float value 1.5 (in the console, type r_stereo 1.5) is a nice compromise since 1.0 doesn't really have enough depth. To enable interlacing, set the new cvar r_stereomode to either 2 (L-R) or 3 (R-L: my Diamondcrysta is R-L), or set it to 1 for the old red-cyan anaglyph. Because it allows larger screen displays the 3D-enabled Quakespasm is much more immersive and is really quite fun to play. For this screenshot I set the separation to a value of 2.0 so that the effect is a little more exaggerated.

This should work on any system (Mac, Windows or Linux, which is my usual environment) and on any graphics card of vaguely recent vintage.

I mentioned Doom in the title, which is more "2.5D," and mixes flat sprites (characters, objects) with 3D environments. There are many modern ports of this but the one I've come to recently enjoy is GZDoom, which as a built-in feature now has row interlacing as well as many other 3D modes in current releases of its renderer. To do this, pull down the console (tilde key) and enter vr_mode 12. Row interleaving in GZDoom is L-R, so I also add vr_swap_eyes true to make it R-L. You can also add this to gzdoom.ini wherever your system stores it (on Linux, ~/.config/gzdoom/gzdoom.ini). Because it tries to centre the window by default, however, I made a tiny patch to force everything to the 3D monitor which I use as a second, spanned display.

In future articles we will explore 8-bit ways of achieving 3D, and consider an alternate approach for when you want to convert a game to stereoscopic 3D but it's already using the stencil buffer.

Sunday, September 27, 2020

Hacking a gopher client into the Alpha Micro

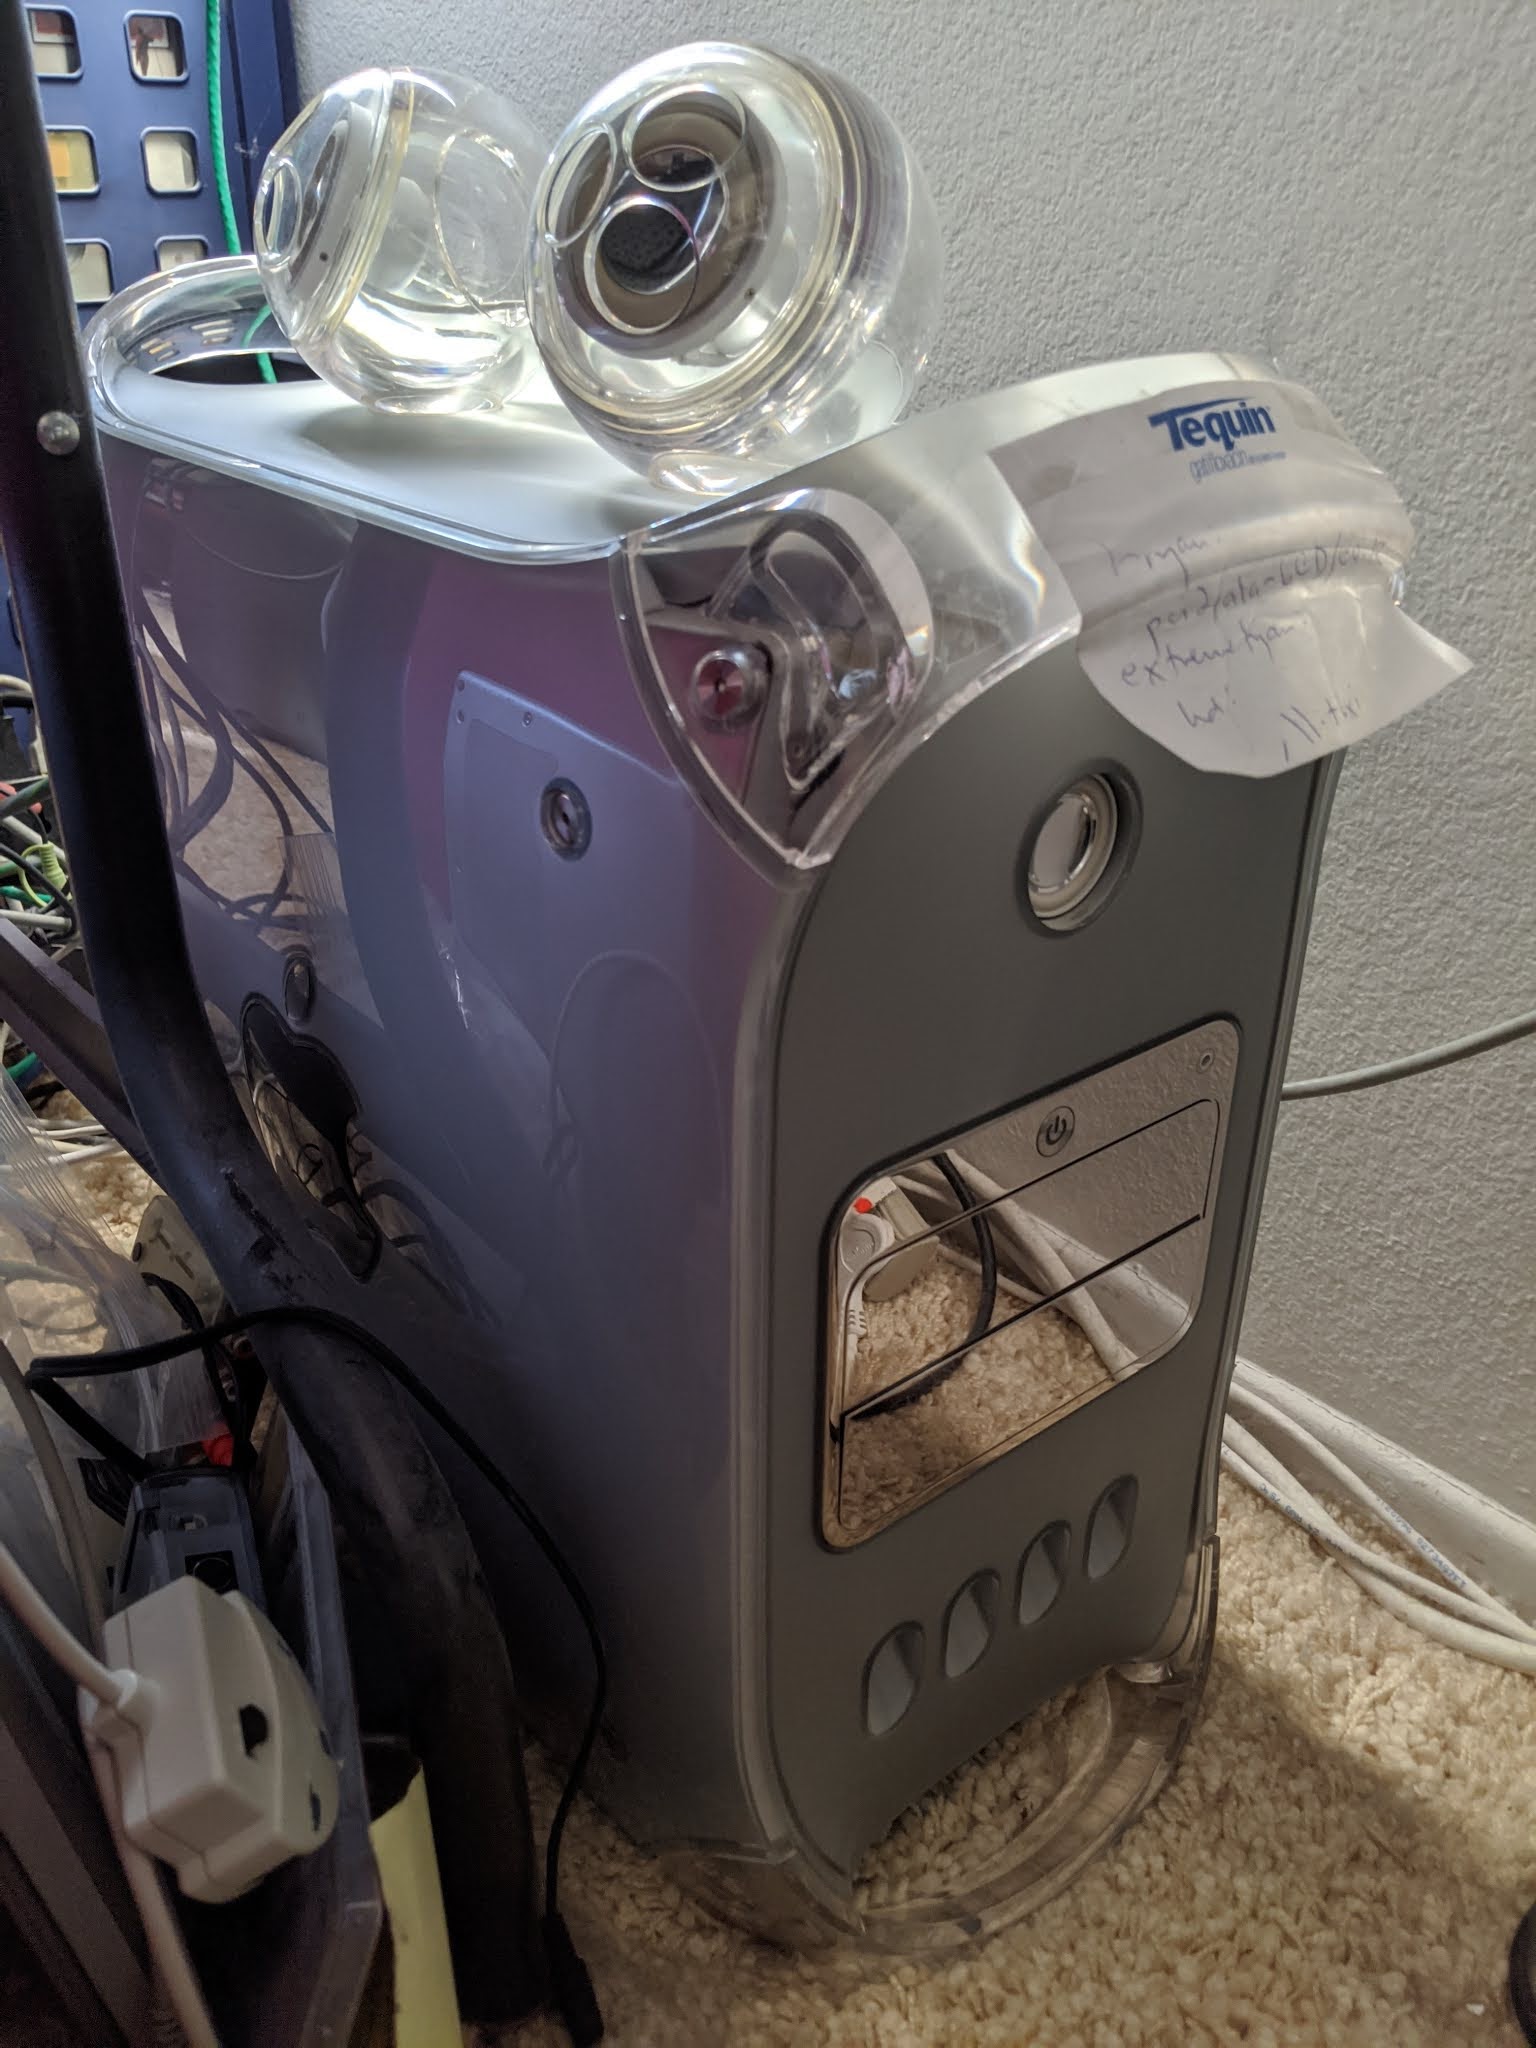
I have great personal affinity for the Alpha Micro multiuser systems, which were the first multiuser computers I ever experienced (an AM-2000 and a battery of terminals at the Salvation Army corps my family and I attended as a kid). These blue-collar machines were famous for their high level of vertical integration; many ran back offices from churches to veterinary offices, and I'll bet a substantial number still do, sitting in a closet quietly continuing to do their job. It is estimated that around fifty or sixty thousand Alpha Micro systems were produced based on known serial numbers. My two main systems came from a party store and a emergency dispatch center, and the primary one (a 1994 AM-3500 Eagle 300, front panel closeup shown above, and the subject of a recent Refurb Weekend) has a webserver and you can access it.

AMOS, the Alpha Micro Operating System that they run, is a curious beast especially to modern sensibilities, largely because of its strong DEC influence via TOPS-10. Although AMOS is not a descendant, it adopted many of its conventions to the point where DEC actually (though unsuccessfully) sued Alpha Micro over it in 1984. The filesystem is 6.3 and case-insensitive, and instead of subdirectories files are divvied up by octal project-programmer numbers (like [100,7]) on specific devices; all file access is by device and PPN, or aliased pseudodevices called ersatzes that point to specific locations. On the CPU side, AMOS is populated by process-like entities called jobs (at least one is attached to every terminal or pseudoterminal) with a system limit on the number of jobs that can exist. On startup jobs have a fixed memory partition allocated to them to store their data and program code, and their permissions are generally determined by the particular PPN they started logged into (for example, [1,2] is the operator and essentially "root"). Some components can be loaded into a systemwide memory partition and be available to all users, though each user does not get a separate copy (so things like COMMON.SBR that implement a primitive key-value store may allow users to see other users' data, unless they are loaded separately into individual user partitions and/or the program is specifically engineered to be "reentrant").

AMOS is also one of a few operating systems (in fact, I struggle to think of any, though there probably are some) that effectively runs the 68K CPU in little endian mode. The CPU is still big-endian internally but the bus lines are swapped in order to preserve data file compatibility with earlier version of AMOS that ran on customized WD-16 CPUs. Opcodes in particular are little-endian, which throws off the ability to easily disassemble code, and Alpha Micro's somewhat non-standard mnemonics don't help. AMOS also does not use nor require an MMU and thus is a strictly real-memory OS with no concept of virtual addresses. The kernel (which is called the "monitor") can still preemptively multitask between jobs on the system, but to deal with memory partitions occupying different addresses, programs are required to run from any location they are placed ("relocatable"). Memory protection is likewise relatively limited in scope, meaning a program that goes awry may occasionally require the machine be forcibly rebooted, although fortunately the OS and filesystem are tolerant of this. The gemisch of components and jobs loaded on system startup is very reminiscent of classic MacOS and while they tend to be better coded and conflicts are rare, once in a great while they can clash just as badly. Making a wrong move with the startup script AMOS32.INI is a great way to render your machine unbootable.

One collection of these components is AlphaTCP, effectively a port of SpiderTCP (and enough of SpiderStreams to implement it), an earlier TCP/IP stack whose most famous implementation was as part of Windows NT 3.1 (replaced in 3.5). However, until the very last version of AlphaTCP it had no means for programs to directly open network connections of their own -- and this particular API, if you can call it that, is pretty baroque anyway -- and my workhorse Eagle 300 still runs an earlier version that doesn't have it regardless. That means relying on what preexisting functionality is already present to support the widest variety of machines. Depending on release AlphaTCP comes with device drivers, servers for HTTP, SMTP, FTP, Telnet, POP and rwhod, the usual utilities such as ping and traceroute (which it calls TROUTE), and clients for Telnet, FTP, mail, HTTP, TFTP and ... finger. Hmmm.

You see, one of my other great personal affinities is Gopherspace. Especially with the "TLS apocalypse" severely limiting the ability of older browsers to access modern Web sites, I think Gopherspace is a better fit for old machines, and clients can be written even for slow memory-constrained 8-bit platforms. (That's an upcoming post, by the way.) The protocol is trivial and interpreting a menu is much, much, much less complex than even relatively simple web pages. And interestingly, the finger protocol and the gopher protocol are in broad strokes identical: send a selector followed by CRLF, get a result, close the connection. The finger client is also well-behaved and can emit files to disk with redirected I/O. Hmmmmmm.

The original way I solved this problem was something I called the "fingerproxy," a modified finger daemon that runs on a proxy host and forwards or parses commands. But this is clunky and isn't self-hosted, and eventually the limitations of this approach became excessive, so a couple weeks ago I decided to make the AlphaTCP finger client do the work itself. At least at first blush it seemed like converting FINGER.LIT (the .LIT extension in AMOS means a "literal" binary file, i.e., an executable) to access a Gopher server instead would just be a matter of changing the port number. (NARRATOR: It wasn't.) So I decided to find the presumed port number and patch it in the binary. The 68000 notionally deals in 16-bit shorts, so I looked for various permutations of 4f (79, the port number for finger) such as 004f or 4f00.

Unfortunately FINGER.LIT is a "huge" 52K binary, the reason for which will become apparent shortly, and this byte appears in lots of places. One of them, however, was part of a string (because it is also the letter "O"). So I ran it through strings and this one popped out:

finger/tcp unknown service

This means it must look up the port number out of the services list! AlphaTCP's equivalent of /etc/services is TCP:SERVIC. (and written in the same format). I edited that file and changed finger's TCP port to port 70, and ...

.finger /@gopher.floodgap.com
3 '/W /' doesn't exist! error.host 1
i This resource cannot be located. error.host 1

It worked!

The next experiment was to copy to a new binary GOPHER.LIT and change all strings in the new file that had finger to gopher so it would use that service entry instead. There weren't a great deal of these and since it was exactly the same length string, it was an easy in-place substitution. This wasn't quite as successful:

.gopher
?GOPHER.RTI not found.

RTI files are "runtime initializers" (essentially the AMOS equivalent of a data segment in a separate file). This is a possible clue it was written in C, not in hand-coded assembler as many Alpha Micro tools are, and being written in C also explains the large(ish) size of the file. I assumed nothing in the RTI depended on these changes and just gave it a copy of FINGER.RTI.

.dir finger.*
FINGER LIT 105 DSK0:[1,4]
FINGER RTI 6
Total of 2 files in 111 blocks

.copy gopher.rti=finger.rti
FINGER.RTI to GOPHER.RTI
Total of 1 file transferred
.gopher /@gopher.floodgap.com
3 '/W /' doesn't exist! error.host 1
i This resource cannot be located. error.host 1

Success!

At this point those of you unfamiliar with the finger protocol will wonder where the /W is coming from. This is documented in the protocol description in RFC 1288 (Gopher's, for the record, is RFC 1436), stating it is sent "to [request] a higher level of verbosity in the user information output." Since by now I strongly suspected this was a compiled C program, I located the string /W and turned it into nulls, effectively making it a zero-length null terminated string. This successfully suppressed the string completely and now I could send selectors and view raw Gopher menus and text files.

This was, however, essentially a single-protocol lunkheaded equivalent of cURL, not an actual console shell. Since lots of strings would be getting slung around I decided to implement a front-end shell using AlphaBASIC, which virtually every AMOS machine comes with and has unusually good string handling for a BASIC dialect. It would create a .CMD file (analogous to a Windows-DOS batch file) that would call GOPHER.LIT with a selector and host, dump the resulting data to a file, and chain back into the front end. This worked great for text files and it paginated them perfectly. It also displayed gopher menus raw on screen just fine, including with what appeared to be the typical tab delimiters between gopher menu item fields (read the RFC for details). But when I tried to actually parse those menu items, it couldn't find any tabs at all.

When in doubt, look at what's coming over the wire. What was coming over the wire (according to my local network snooper) was intact, but when GOPHER.LIT wrote the output to a file, a hex dump of the actual file showed the tabs were getting automatically expanded out into spaces. Weirder still, instead of the typical CRLF line endings I was expecting to see in a gopher menu, I was seeing CRCRLF. What gives?

Because of the little endian byte ordering I mentioned before, disassembling the code turned into a marathon process of flipping 16-bit word byte order and feeding it in sections to a 68K disassembler expecting big endian opcodes. Sensible code resulted but for the life of me I could not find any code that obviously turned tabs into spaces. I found the code that parsed whitespace in the services file (in fact, I found that in a couple different places), but nothing that actually generated white space or, for that matter, doubled-up carriage returns.

The remaining variable was the redirection of the output to a disk file. In AMOS, this is done by intercepting terminal output routines. What if this was something the terminal driver was doing? I wrote a tiny little assembler program to test.

SEARCH SYS
SEARCH SYSSYM

PHDR -1,,
MOVB #9.,D1
TOUT
TYPECR <Hello, world!>
EXIT

END

68000 assembly language programmers will have recognized exactly one opcode in that file (and even that is atypical: you probably would write it as MOVE.B). The rest of it are directives or macros; writing assembly programs on AMOS is actually a real pleasure because of the rich number of macros and monitor service calls to make your life easier. More about that in a second, too, but what this is doing is emitting a tab character and the string Hello, world! followed by CR. I assembled it with the trusty M68 assembler, emitting this tiny object file (the first four bytes are a disk pointer and are not actually part of the file):

000000: 00 00 00 00 FF FF 00 01 00 00 00 00 00 00 3C 12
000010: 09 00 06 A0 0C A0 48 65 6C 6C 6F 2C 20 77 6F 72
000020: 6C 64 21 0D 00 00 12 A0

You can see there is no line feed or spaces, and you can see the CR (0x0d) and tab (0x09). I ran it, redirecting its output to a disk file. The file dumped like so:

000000: 00 00 00 00 20 20 20 20 20 20 20 20 48 65 6C 6C
000010: 6F 2C 20 77 6F 72 6C 64 21 0D 0A

The file had spaces instead of the tab character, and had CRLF at the end instead of CR. The terminal driver was indeed munging the output.

Monitor calls on AMOS are implemented using 68K A-line traps. Whenever the processor sees an instruction with a first (most significant) nybble of 0xA, an A-line exception is triggered and sent to the operating system. (Most 68K operating systems exploit this feature for system calls; 68K Macintoshes implement Toolbox calls this way. There are also F-line traps for FPU instructions which notionally allow emulation on systems that lack them, though interestingly the Atari ST uses both A-line and some F-line traps as GEM calls.) In the bowels of the Alpha Micro monitor calls documentation is a table for a terminal status bitfield called T.STS:

The T$DAT bit enables "complete data transparency." This sounds like exactly what we want! It says we should manipulate it only with the TRMWST (terminal write status) and TRMRST (terminal read status) monitor calls. These are macros and their definitions in SYS.M68 look like this:

DEFINE TRMRST DST,PORT
        IF B,PORT,      SUB     A6,A6
        IF NB,PORT,     LEA     A6,PORT
        SVCA    171,,,,D7,DST
ENDM
DEFINE TRMWST SRC,PORT
        IF B,PORT,      SUB     A6,A6
        IF NB,PORT,     LEA     A6,PORT
        SVCA    172,,SRC,D6
ENDM

The B and NB mean "blank" (not provided) and "not blank" (provided) with respect to the parameters. We don't need the port argument since we are only interested in talking to the default terminal. The source and destination parameters are for sending and receiving the new value respectively. That gets passed to another macro called SVCA, which is the supervisor call macro, shown here:

DEFINE  SVCA    ARG,A,B,C,D,E
        IF      NB,A
         NTYPE  ...X,A
         IF NE, ...X-^O26, LEA A6,A
        ENDC
        IF      NB,B
         NTYPE  ...X,B
         NTYPE  ...Y,C
         IF NE, ...X-...Y, MOV B,C
        ENDC
        WORD    ^H0A000+^O'ARG*2
        IF      NB,E
         NTYPE  ...X,D
         NTYPE  ...Y,E
         IF NE, ...X-...Y, MOV D,E
        ENDC
ENDM

Without getting too deep in the weeds here (too late?) this macro looks at the types of the arguments and if they aren't suitable issues instructions to get everything in the right place, since the 68K instruction set is not fully orthogonal. The real magic here is the WORD pseudo-op: this is what emits the A-line instruction. The default radix for M68 is octal (I told you this was heavily DEC-influenced), so punching a couple figures into the ol' scientific calculator, the A-line instructions that TRMRST and TRMWST respectively generate are 0xA0F2 and 0xA0F4.

The next thought was where to sneak this in. I figured I could mash this into a few shorts and trim down one of the messages for space; I'd only need to do this when the executable starts because this bit is helpfully reset for us when returning to the AMOS command prompt. However, it would be easy enough to check first if the code was already making these calls for some other purpose, since it seemed very unlikely to see an F2 A0 (to read the status word) near a matching F4 A0 (to write out the modified one).

% xd gopher.lit | grep -A2 'f2.a0'
00000690 4d 21 22 01 ce 9d f2 a0 07 20 40 00 10 00 ce 9d
000006a0 00 2c f4 a0 fc d7 00 00 00 80 7c 2b 00 00 00 10
000006b0 a8 84 7c 2b 00 00 00 04 a4 84 7c 2b 01 00 00 00

Jackpot (boldface added for clarity). This only occurred once in the entire file. Byte-swapped and disassembled into standard mnemonics, the relevant instructions are

suba.l d6,d6
.short 0xa0f2
move.l d7,d0
ori.w #0x10,d0
suba.l d6,d6
move.l d0,d6
.short 0xa0f4

The program was already manipulating the status word to turn on lower case input (with T$ILC), since most fingerds on the other end wouldn't be expecting uppercase. We can see what we have to do: if we add 0x08 to the 0x10, we get that extra bit turned on at the same time. I made this in-place change and now the AlphaBASIC shell could see and parse the tabs!

However, files when downloaded were not checksumming. Indeed, this fixed the tab problem but not the CRCRLF issue, and there was an extra CRLF at the end. There is no status bit to disable that; it turns out that turning LF into CRLF is intrinsic to the standard output routines, so it would faithfully turn any CRLF already being received into CRCRLF, and the output redirection added the extra line at the end as a final insult. Since we are using a driver script and emitting to a file anyway, the solution here was simply to write a postprocessor in assembly (AlphaBASIC would be unacceptably slow for this, and isn't very adept at binary file handling) that the driver script calls afterwards to get rid of the extra CRs and remove the extraneous line at the end. I chose to do this as separate utilities for each individual task ("one thing well") and they might actually be useful utilities in their own right in any case. At last: every file I downloaded in this fashion checksummed correctly!

With the rudiments now properly functioning, it was time to finish the front end. A couple feverish days of coding later, drum roll please:

This is GAMBLE.BAS, the Gopher Alpha Micro Browsing-Linking Environment, displaying Floodgap's root gopher menu on the Eagle 300 with its beautiful colour AM-75 console (a modified Wyse WY-370). Gopher works very well from the keyboard and because everything is stored as a file, GAMBLE can display arbitrarily large menus and text documents limited only by disk space. Another nice side effect is that saving binaries and other resources is merely a matter of renaming the temporary file. If you have an Alpha Micro with AMOS 2.3A and AlphaTCP 1.3C or 1.5A you'd like to run this on, source code and binaries are available on the Floodgap gopher server (or via the Public Proxy).

As an enticement, I have uploaded the old Alpha Micro Users' Society network library archive to the Gopher server as well, and GAMBLE can access it directly. Check it out!

I should note that the approach I have chosen here is not without its drawbacks. AMOS has a maximum command line length of about 92 characters, and since .CMD files drive the command line in the same fashion, they have the same limitation. This means that with all the other pieces of the command, the combined length of the hostname and Gopher selector is limited to about 80 characters making certain portions of some sites inaccessible (the front end checks this, and won't let you select them as a precaution). In addition, a selector with quote marks or @ characters would similarly be inaccessible because these are reserved by the shell and (ultimately) FINGER.LIT, though these characters are not commonly found in Gopher selectors, and of course the dependence on the port number being in TCP:SERVIC. means it will only ever communicate over port 70. A TAMED (using the socket API) approach in AlphaBASIC would avoid the selector and port limitations but it would impose others, notably speed as well as handling binary data and possibly memory capacity, and it wouldn't run on AlphaTCP 1.3C. A lot "just works" this way on the widest variety of systems, and I might think of better ways to tackle these deficiencies over time.

Most of all, though, this entire endeavour probably taught me more about AMOS than all my puttering around with it had as a toy over the last decade or so. For one of my favourite and certainly more obscure machines, this was a stimulating and actually vaguely useful project, and I'll be thinking about other things I could be doing with it now that my appetite is whetted. Meanwhile, this isn't the last gopher client we'll be writing in this blog: stay tuned for some other machines that I really need to be tunnelling through Gopherspace with.

Friday, September 25, 2020

64-bit build of Tutti II, the Tomy Tutor Emulator

A quick note that there is now a 64-bit macOS build of Tutti II, the best Tomy Tutor emulator other than MAME (being, near as I can tell, the only Tomy Tutor emulator other than MAME). This fixes issues with blank windows on 10.14 and runs correctly on 10.15, and damn well better run on 11.0. Don't worry, I haven't forgotten about Power Mac and 32-bit owners; you get a minor fix too with some improved timings. 32-bit Tutti II will run on any Power Mac or Intel Mac from 10.4 through 10.13; 64-bit Tutti II will run on any Intel Mac from 10.12 to 10.15.

Tutti II is open source; as of this release development has moved to Github. Although I don't offer a fully-fledged Win32 build yet, I do have work on a Windows port completed, and once I am satisfied it is of the same poor quality as the Mac versions, I will release that too. You can build it for yourself if you like if you have mxe and MinGW; I am willing to accept Visual Studio solution files if you come up with any.

Tuesday, September 1, 2020

RIP, Curt Vendel

Very unfortunate to hear about the sudden passing of Curt Vendel, a great figure in the Atari scene. The best Atari Flashback (2600 clone) was the second one where he learned from the error of using the "NES on a chip" in the first Flashback, and instead designed a system so compatible you could put a cartridge port in it and play your old VCS games (and a system so easy to hack that the board has specific solder points and guides you how to make the modification). Probably his most lasting contribution to vintage computing was the Atari History Museum he founded in 1988 with over 15,000 files, folders and documents, plus two entire room-sized archives of schematics, mechanical drawings, artwork and design film, some of this even salvaged from Atari's own dumpsters. He was only 53. Rest in peace.

Sunday, August 30, 2020

A second look at computer stereoscopy with the Minoru 3D webcam and Camaglyph

This article will be part of a series -- you can read other entries

Did you see what I did there? I'm proud of that title. Thank you very much.

Is 3D vintage computing? Well, it's complicated. 3D in computing didn't really have much traction in the early microcomputer age because of the limited palette, resolution and computing power: it was hard enough generating one image, let alone two and then figuring out ways to merge them. (I have some ideas about that but more later.) Apart from colour anaglyphs, best known as the red-blue glasses method, early stereoscopic computing was generally limited to active technologies (i.e., show one eye and then show the other), and the slower switching rates made this a rather flickery, headache-inducing affair. While some higher-end video cards like the Nvidia Quadro FX 4500 in my Power Mac Quad G5 (circa 2005-6) have connectors for active stereo glasses -- in this case a 3-pin mini-DIN -- almost all of these were proprietary and very few software packages supported it. Worse, these glasses wouldn't work with flat-panel LCDs, which were already displacing CRTs by then, because of the higher refresh rates required. There were some home gaming products like the Sega Scope 3D for the Master System, plus the infamous Nintendo Famicom 3D System and Nintendo Virtual Boy, but these only succeeded in showing the technical infancy of the genre and possibly increasing local referrals to ophthalmologists. (I'm intentionally ignoring lenticular and Pulfrich stereoscopy here because of their limited applications.)

IMHO, stereoscopic computing didn't really hit the mainstream until the advent of Blu-ray 3D, which increased, at least temporarily, the home market for polarized LCD displays that could show 3D content using passive glasses. Colour anaglyphs are neat, and can be done well, but they necessarily interfere with the colour palette to ensure that each eye gets as separate an image as possible (even tricks like Dolby 3D do this, though usually imperceptibly). Although active displays are still a thing -- my 3D home theatre is DLP, and uses DLP-Link, which are 120Hz active glasses -- they're also heavier and have to be powered, and active display solutions are overall more expensive. Passive LCD 3D screens, however, were for at least a few years plentiful and relatively inexpensive, and most TVs of a certain vintage came with the feature when it was thought 3D would be the next big thing. 3D movie cameras powered many major studio production shoots and 3D movies were plentiful in consumer stores. Many games for contemporary consoles, notably the Xbox 360 and PlayStation 3, offered stereoscopic gameplay, and you could even buy computer monitors that were 3D. My secondary display is a Mitsubishi Diamondcrysta RDT233WX-3D, which is an exceptionally fine IPS passive display I ended up importing from Japan, but there were many manufacturers on both shores.

Well, those days have died. If you look at Wikipedia's list of stereoscopic video games, which is a good summation of the industry, there is a dramatic falloff around 2014. Most 4K TVs in the United States don't offer a 3D mode of any sort, partially for technical reasons I'll mention, and only a subset of console games still support stereoscopy. Many players will still play them but Blu-ray 3D movies are all but gone from the American market. While movie theatres still offer(ed) 3D showings, COVID-19 has kind of crushed that industry into little tiny theatre bits, and very few major motion pictures are filmed in native 3D anymore. I think it's safe to say that until such time as the fad revives, as fads do, stereoscopic computing has retreated back to the small realm of enthusiasts.

And, well, I'm one of them. I'm not as nuts as some, but in addition to the Diamondcrysta monitor I have a 3D home theatre (using DLP and DLP-Link glasses), a Vizio 3D TV, a Nintendo 3DS and a Fuji FinePix Real 3D W3 still and video camera. I've got heaps of Blu-ray 3D that I imported at sometimes confiscatory rates, but happily most of them are all-region. I'm pretty much on my own for software, though, so I figured writing a simple display tool for a 3D webcam was a good place to start with writing my own stereoscopic applications. And there's one available very cheaply on the remaindered market:

This device is the Minoru 3D webcam, circa 2009. Despite the name (it means "reality" in Japanese), the device is actually a British creation. It is not a particularly good camera as webcams go, but it's cute, it's cheap and it's 3D. However, it only comes with Windows drivers, and they don't even work with Windows 10 (probably why it's so cheap now). My normal daily driver is Linux. Challenge accepted.

The Minoru appears to the system as two USB Video Class cameras in a single unit connected by an internal hub; lsusb sees the two cameras as Vimicro Venus USB 2.0 devices, which is a very common USB camera chipset. Despite the documentation, the maximum resolution and frame rate of the cameras is 640x480 at 30fps and the 800x600 mode advertised appears to be simply software upscaling. Nevertheless, when treated as separate devices, the individual video cameras "just work" with Video4Linux2 in VLC (the "eye" lights up when it's viewing you), so what we really need is something that can take the two images and merge them.

The Minoru's included drivers offer a side-by-side mode but most people will run it in anaglyph mode. Appropriately, it comes with a metric crapton of cardboard glasses you can give to your friends so they can see you in all your dimensions. There are many colour schemes for anaglyphs but the most common is probably red on the left lens and blue (or preferably cyan) on the right, and there are many algorithms for doing that. I wrote a simple V4L2 backend that runs both camera sides simultaneously and pulls left and right frames with an SDL-based frontend as the visualizer, and then selected two methods that are generally considered high(er) quality.

The first, the optimized anaglyph method, is quite straightforward to implement: for the merged image, use the green and blue channels from the right image, and compute the red channel of the merged image using 0.3 of the left image's blue channel and 0.7 of the left image's green channel. (Some versions of this boost use a 1.5 factor prior to merging them, i.e., a 50% boost, which helps with dimness, but means the resulting value needs to be clamped.) This has the effect of dropping both images' red channels completely but the eye can compensate somewhat, and the retinal rivalry between eyes is reduced compared to more simplistic methods. A SIMD-friendly method of doing this is to simply copy the entire right image to the merged image, and then overwrite the red channel in a separate loop. There is still a bit of ghosting but this sort of image can be rendered very quickly. Here is an optimized anaglyph image of yours truly from the Minoru, viewable with red-cyan glasses:

A superior and widely adopted anaglyph method is the one devised by Eric Dubois. His innovation was using a least-squares approach in the CIE-XYZ colourspace which can be approximated with precomputed coefficients, using matrix multiplication to merge the two images. It is slow to compute and requires saturation math to deal with clipping, and reds get turned into more of an umber (you can see this on what's supposed to be my red anaglyph lens), but the colour rendition is overall better and ghosting between the two sides is almost absent. Here is a Dubois image of me in almost the same position, also viewable with red-cyan glasses:

But anaglyph is just not satisfactory for good colour rendition even if you get accustomed to it, and even the best anaglyph glasses with good lenses and dioptres will still have some ghosting between sides on most colour images. This is where passive 3D comes in.

Most passive 3D monitors use alternating polarization, implemented as either a second glass substrate called a patterned retarder, or more recently using a film overlay (called, naturally, a film-based patterned retarder). Each separate line of the display alternates polarization, which without polarized glasses only shows up as a very faint linear interlace. My Diamondcrysta and Vizio passive 3D displays are 1080p, so with glasses off you get all 1080 lines, and with glasses on 540 lines go to one eye and 540 lines go to the other. (This is probably why 4K displays don't do this, other than cost: it would make upscaling 3D 1080p content lower quality because the horizontal lines cannot be interpolated or smoothed.)

This is obviously lower 3D resolution than an active display, where the entire screen (like on my DLP projector) alternates between each eye. However, the chief advantage to us as homebrewers is that the polarization is an intrinsic property of the display -- anything displayed on that screen is subject to it, rather than relying on some vendor-specific video mode. That means anything can display anything in 3D as long as you understand which lines will be activated by what you draw.

My Diamondcrysta is a R-L display (the polarization goes right-left-right-left-etc.), so starting with line 1 at the top, odd lines must show the right image and even lines the left image. This requires us to find out where the actual image is positioned onscreen, not just the position of the window, since window decorations will shift the image down by some amount. SDL 2.0 will tell us where the window is, but I'm using SDL 1.2 for maximal compatibility (I'd like to port this to my G5 running Mac OS X Tiger), so instead when we display the image we ask SDL for the underlying widget, get its on-screen coordinates, ask X11 how big the window decorations are and then compute the actual Y-position of the image. You could then draw the merged image by doing alternating memcpy()s line by line, but with today's CPUs with potentially big SIMD vector registers, I simply did a big copy of one entire view and then on every other line drew in the lines from the other view, which is noticeably faster. This yields the following image, which redraws itself with the proper lines in the proper places when the window is moved:

You'll need to view the full-size image (click on it). To view this on a passive polarized 3D display or a 3D TV acting as a monitor, you've got exactly a 50% chance that your web browser will already have it at the right Y-position. If it doesn't, you may want to save the full size image to disk, open it up on that display, and shift its window up or down pixel by pixel with your polarized glasses on until it "pops." Your monitor does not have to be put into any special "3D mode" for this to work.

The source code is in pure C, runs entirely in userspace, and should build on any Linux system (including big-endian) with V4L2 and SDL 1.2. I call it Camaglyph and it's on Github. It's designed to be somewhat modular, so once I sit down and write a QuickTime or QTKit grabber I should be able to make this work on my G5. I've included a configuration file for akvcam so you can use it as, you know, a webcam.

In future posts we'll look at converting classic games to work with stereoscopic displays instead of just having anaglyph modes, and explore some ideas about how we can get classic computers to display anaglyph 3D.

Tuesday, August 11, 2020

PAL RF or bust with the LCDT600: unscreenshotable part IV

This is part of a series — you can read prior entries

For the Secret Weapons of Commodore, part of the updates for the 15th edition involved the Commodore TV Game series, Commodore's unusual and infrequently seen family of Pong clones based on their own MOS 5601 and 7601 Pongs-on-a-chip. It would have been nice to get screengrabs of these, but not only are they strictly RF (i.e., analogue television), they're PAL, and I'm here in the United States of COVID-19. While many PAL TV sets could be dual-mode, NTSC sets almost never were, and nowadays everything is digital anyway. So what to do? Get a TV tuner that emits some other signal you can capture. And, incredibly, such a thing exists: the LCDT600 and LCDT601.

These are rebadged by a variety of distributors but except for some case and button differences are the same basic unit, and most retail for around US$60. As the ports on the rear show, the LCDT600 is a multifunction device that takes input from either composite CVBS video, S-video, VGA (using a strange mini-DIN port, but a converter is in the box) or RF, and then emits it to VGA at a variety of resolutions. Audio is supported, though not needed for our particular purpose, and the unit also allows you to overlay video from another source on top of the VGA output for "picture-in-picture." The LCDT600 and its newer but otherwise identical sibling LCDT601 emit at resolutions from 800x600 through 1920x1200, all at 60Hz, controlled by a chintzy little mini remote. Most of the machine's functions are controlled with on-screen menus, so don't lose it.

We are most interested in the tuner, and the LCDT600 does well here too. Out of the box it has a standard PAL female jack, which the TV Games connect to readily, but can be converted to an NTSC F-style jack with a simple converter (also included). It tunes NTSC and PAL B/G/D/K/I. Some primitive post-processing is available to smooth the images, but I didn't really test this thoroughly.

Capturing the stream, then, is merely a matter of capturing the VGA output. Fortunately, we already have a device for that: the INOGENI VGA2USB3. And since the LCDT600 emits at 60Hz, the signal is fully compatible with the VGA2USB3, so no further conversion is required. I was able to view the stream in VLC on my Raptor Talos II workstation and take direct screengrabs from there.

However, the next problem is I have no idea what channel the TV Games transmit on, let alone the frequency. Fortunately, the LCDT600's auto channel scan comes to the rescue, after I changed the on-screen language to English instead of Chinese and set the TV standard to PAL-G (since these were Western European devices):

With the TV Game console connected and turned on, the LCDT600 easily found the channel it was transmitting on and presented credible pictures. There is some smearing with bright white but otherwise relatively little chroma noise. Here are some full-res grabs, the top two from the TV Game 2000K and the bottom from the TV Game 3000H:

If all you've got is RF or bust, then the LCDT600 is probably the best and easiest solution, and the price isn't exorbitant. Nothing will make super-sharp images but at least you'll have them.

On a related note, if you can't get a look at the main chip on the TV Game 2000K board because the motherboard is soldered in place underside up, use a little cheap USB camera probe to get a look at the other side:

Now go read the 15th edition updates for the Secret Weapons of Commodore.